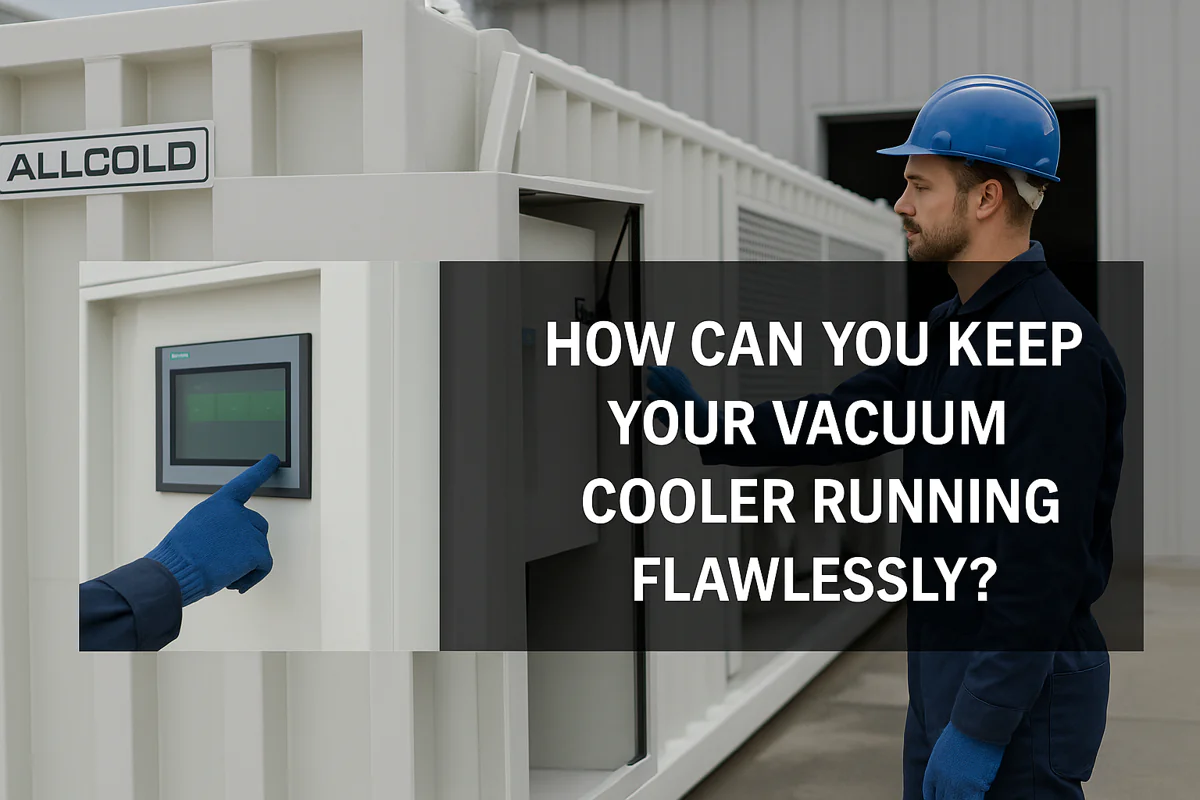
How Can You Keep Your Vacuum Cooler Running Flawlessly?
Your vacuum cooler is a vital asset, but you’re worried about unexpected breakdowns during peak season. Neglecting maintenance feels like a risk, but you’re unsure where to start or what to prioritize in a busy schedule.
Implementing a consistent maintenance schedule is the key to maximizing your vacuum cooler’s lifespan and efficiency. This involves simple daily checks, weekly cleaning, monthly inspections, and comprehensive annual servicing to prevent costly downtime.

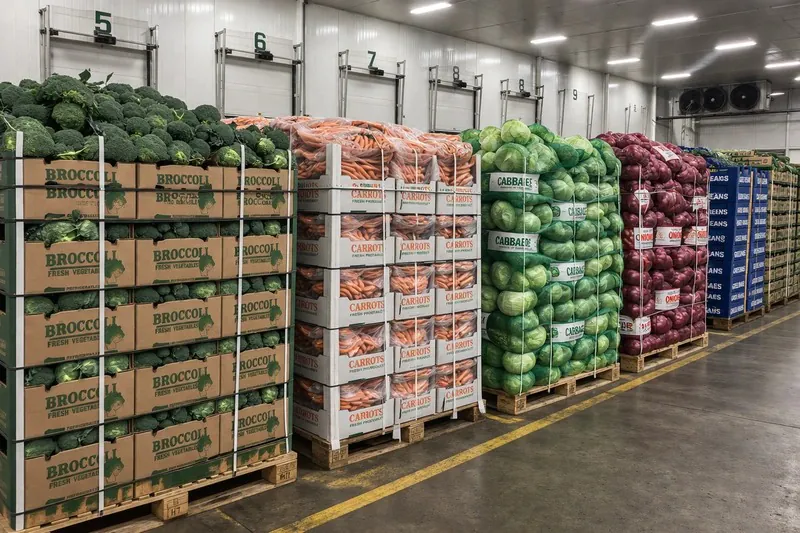
I remember a call from a frantic farmer in California, Norman. His machine had stopped mid-harvest, right in the middle of a heatwave. It turned out to be a simple, completely preventable issue caused by a clogged condenser. He lost valuable time and the quality of several pallets of lettuce was compromised. That day, I promised myself I would create a simple, clear guide to help all my clients avoid that kind of stress. Regular maintenance isn’t a cost; it’s the best insurance policy for your business. Let’s break down the schedule that will keep your machine in peak condition, year after year.
What daily checks are essential for your vacuum cooler?
Each day brings a heavy workload, and it’s easy to overlook the small things. You’re concerned that your team might miss a critical sign of a developing problem, leading to a sudden failure when you can least afford it, like in the middle of a large order.
At the start of every shift, a quick 5-minute walk-around is essential. This includes visually inspecting the door seal, checking the control panel for any error messages, and listening for unusual noises during the first cycle.

Your First Line of Defense
Think of the daily check as a morning health routine for your machine. It’s the simplest, most effective way to catch small issues before they snowball into major repairs that could shut down your packing line. A few disciplined minutes each day can save you hours, or even days, of downtime later. It’s about building a habit of preventative care within your team and empowering them to take ownership of the equipment they use every day.
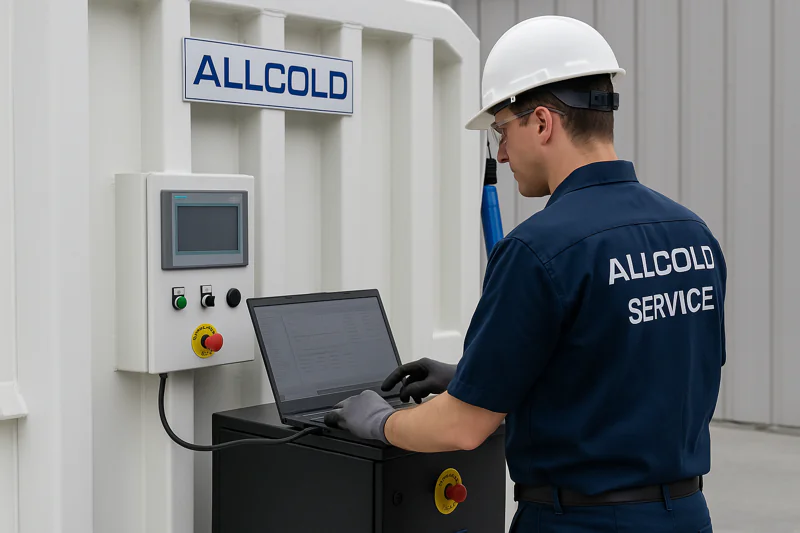
First, make the door seal inspection a priority. This gasket is the most critical barrier for creating the vacuum. Instruct your operators to look for any debris from the previous day, like leaves, stems, or soil, and wipe it clean with a damp cloth. More importantly, they should physically feel for small cracks, brittleness, or flat spots which indicate the seal is wearing out. A poor seal forces the vacuum pump to work much harder and run longer to reach the target pressure, which wastes a surprising amount of electricity and puts unnecessary strain on the pump motor. An inefficient seal can easily add minutes to every cycle. Over a week, that’s hours of lost productivity. Next, power up the machine and observe the Siemens touch screen. Our control panels are designed to self-diagnose many potential issues. Train your team to recognize and report any error codes or warnings immediately. Don’t just reset an error and hope it goes away; that’s like ignoring the check engine light in your car. Finally, during the first cycle of the day, just listen. You and your operators know what your machine sounds like when it’s running smoothly. Any new or strange sounds—a high-pitched squeal often points to a failing bearing, a rhythmic clanking could be a loose component, and excessive vibration might signal an unbalanced fan blade. Catching these auditory clues early can turn a major potential repair into a simple, scheduled fix.
| Daily Task | Area of Focus | Why It’s Important |
|---|---|---|
| Inspect Door Seal | Rubber Gasket | Ensures a perfect vacuum seal, preventing pump strain and extending cycle times. A clean, intact seal is vital for efficiency. |
| Check Control Panel | Siemens Touch Screen1 | Identifies any system errors or alerts before they cause operational problems. It’s the machine’s primary communication tool. |
| Listen for Noises2 | Pump, Compressor, Fans | Detects early signs of mechanical wear, bearing issues, or loose parts, allowing for proactive repairs before a catastrophic failure occurs. |
| Visual Leak Check3 | Hoses and Connections | Catches potential refrigerant or oil leaks before they become critical and cause major damage or create safety hazards on the floor. |
What weekly cleaning tasks should you perform?
After a week of heavy use, dirt, dust, and organic debris can build up on your machine. You worry that this accumulation could severely reduce cooling efficiency, create hygiene issues, and eventually damage critical components like the condenser.
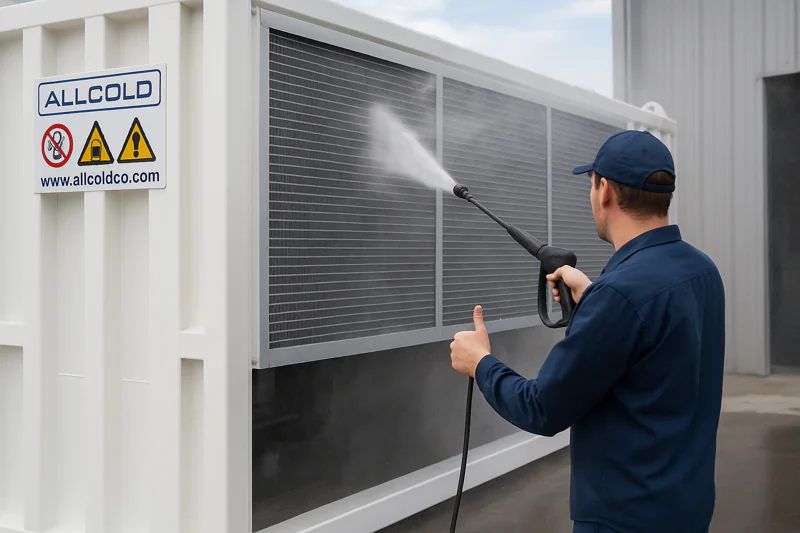
Once a week, you should thoroughly clean the interior and exterior of the vacuum chamber and, most importantly, wash the condenser coils. This simple cleaning routine maintains cooling efficiency and ensures food safety standards.
Maintaining Peak Performance and Hygiene
A clean machine is an efficient and safe machine. Over a single week, especially during dusty harvest seasons, an enormous amount of airborne particles, leaves, and other field debris can get drawn into the system. This buildup acts like a thick winter blanket on your condenser, suffocating its ability to release heat into the atmosphere. This directly impacts cooling performance, extends cycle times, and dramatically increases energy consumption. Neglecting this is like trying to run a marathon while wearing a heavy coat; the system will overheat and eventually fail.
Start with the vacuum chamber4 itself. After ensuring the main power is disconnected and locked out for safety, wipe down all interior stainless steel surfaces with a food-grade sanitizer. Remove any residual organic matter like leaves or mud. This is a crucial step for people like Sophia, a central kitchen manager, who must meet strict HACCP hygiene standards5 and prevent any cross-contamination between batches of cooked rice and chicken. Next, move to the exterior, specifically the condenser coils6. These delicate aluminum fins are designed to provide a massive surface area for dissipating heat from the refrigeration system. When they are clogged with dust, the compressor has to run longer and work much harder to cool the refrigerant, which can lead to overheating and premature failure of a very expensive component. For cleaning, use a soft brush or a low-pressure air hose to gently remove loose debris. For more caked-on grime, a specialized coil cleaning foam or a gentle wash-down with a hose is effective. The key is to use low pressure—a high-pressure washer can easily bend the delicate fins, which would permanently reduce your machine’s efficiency. A clean condenser can improve energy efficiency7 by as much as 30% in some cases, a saving that adds up significantly over a season. Also, consider your water quality; hard water can leave mineral deposits, so using treated water for cleaning is a best practice.
What is on the monthly maintenance checklist?
You know some parts need more than just a quick look or a cleaning. You’re concerned about hidden issues inside the mechanical and electrical systems, like low oil levels or loose connections, that could cause a major breakdown without any obvious warning signs.
Every month, you should inspect the oil levels in the vacuum pump and compressor, check electrical connections for tightness inside the control panel, and test all safety functions like the emergency stop buttons and door interlocks.
A Deeper Dive into Machine Health
Your monthly checkup is about looking under the hood of your machine. While daily and weekly tasks focus on surface-level operation and hygiene, the monthly inspection ensures the heart and brain of your machine are healthy. These core systems work incredibly hard, and verifying their condition is non-negotiable for long-term reliability and safety.
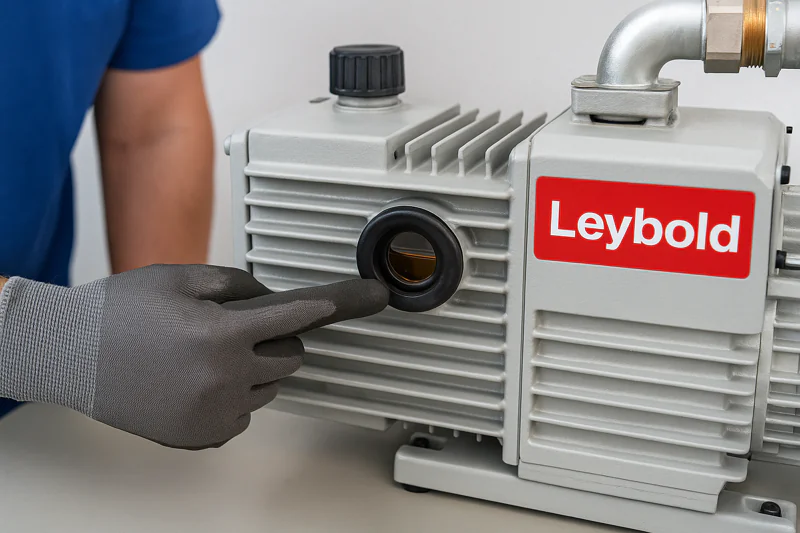
The most important monthly task is checking the oil, which is the lifeblood of your most critical components. Both the vacuum pump and the refrigeration compressor rely on specialized oil for lubrication, cooling, and creating seals. Most of our machines, equipped with top-tier components like Leybold pumps and Bitzer compressors, have an oil sight glass8 for easy inspection. The oil level should be between the minimum and maximum marks. But don’t just check the level; check the condition. Good oil is typically clear and amber-colored. If the oil in the sight glass appears milky or cloudy, it’s a critical sign of moisture contamination9, which drastically reduces lubricating properties and can lead to catastrophic bearing failure. If it’s very dark or smells burnt, it’s breaking down and also needs immediate replacement. Next, schedule time for a qualified electrician to perform a safety check10. With the power safely locked out and verified, they should open the main electrical panel. The constant micro-vibrations of the machine can sometimes cause screw terminals on contactors, relays, and circuit breakers to loosen over time. This creates electrical resistance, which generates heat and can lead to component failure or even a fire. A quick check with an insulated screwdriver to ensure all connections are snug can prevent a disaster. Finally, test every single safety system. Physically press each emergency stop button11 to ensure it halts the machine’s cycle immediately. Manually activate the door interlock switch during a test run to confirm it functions correctly. A safety system that isn’t regularly tested cannot be trusted to work when it’s truly needed, and this is a critical point for both operator safety and your legal liability.
How can you troubleshoot common vacuum cooler alerts?
The control panel flashes an alert, the machine stops mid-cycle, and a wave of panic sets in. You’re losing precious cooling time with a valuable harvest sitting on the floor, and you don’t know if this is a 5-minute fix or a 5-day disaster.
When an alert appears, first note down the specific error code displayed on the screen. Then, check for obvious physical causes like an obstructed door or a tripped circuit breaker before attempting a single system reset.
Your First Responder’s Guide
Even with perfect maintenance, problems can occur. The key is how you and your team respond. The worst thing you can do is repeatedly reset the machine without understanding the cause; this can turn a simple problem into a very expensive component failure. I always tell my clients, like Carlos who values rapid responses, to create a simple troubleshooting chart and post it right on the machine. Empowering your operators to perform basic diagnostics saves everyone time and money. Think of this as first aid for your machine.
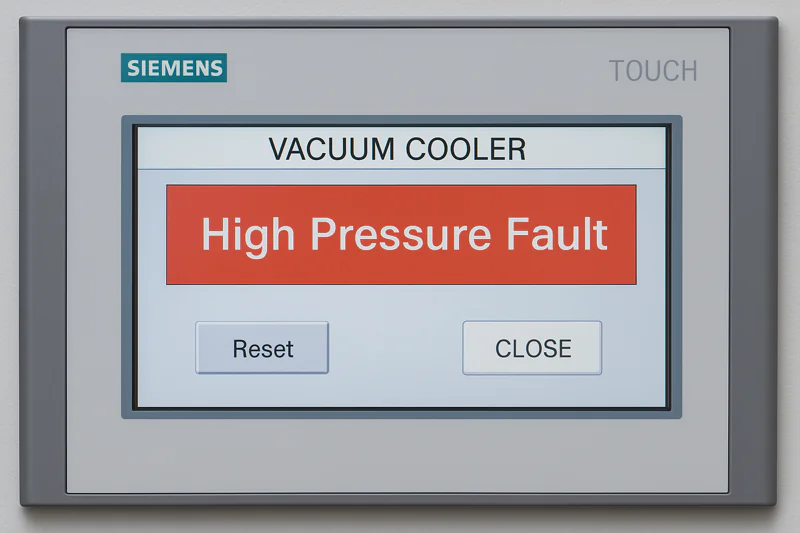
Let’s break down the most common alerts. These faults generally fall into three categories: vacuum system issues, refrigeration system issues, or electrical faults. Your control panel will give you a specific code, but understanding the category helps you know where to look. For example, a "Failure to Reach Vacuum" alert almost always points back to a physical leak, usually the door seal. We already discussed checking it daily, but this is where that diligence pays off. Before calling for service, your operator’s first step should be to re-clean and inspect the entire door gasket. More often than not, this solves the problem. A "High-Pressure Fault" is a classic refrigeration alert. In 90% of cases, this is caused by what we talked about in weekly maintenance: a dirty or clogged condenser. The system is essentially overheating because it can’t get rid of heat. The immediate action is to safely shut down and visually inspect the condenser coils for dirt, dust, or even plastic bags that might have been sucked against it.
| Common Alert | Possible Cause | Operator’s Immediate Action (After noting code) |
|---|---|---|
| Failure to Reach Vacuum | Dirty or damaged door seal; object obstructing door. | Power down. Thoroughly clean and inspect the entire door seal. Check for any obstructions. Retry one time. |
| Refrigeration High-Pressure Fault | Condenser coils are dirty or blocked; condenser fan not running. | Power down. Visually inspect condenser for debris and clean if necessary. Check if the condenser fan is free to spin. |
| Vacuum Pump Motor Overload | Electrical issue; pump is seizing due to oil problems. | Check the main circuit breaker. If tripped, reset once. If it trips again, DO NOT reset. Check pump oil level and condition. Call for service. |
| Emergency Stop Active | An E-Stop button has been pressed and not released. | Locate the pressed E-stop button on the machine or control panel and twist to release it. Reset the system on the main screen. |
What does annual professional servicing involve?
After a full year of demanding operation, you want to ensure your machine is reset and ready for the next season. You know a professional inspection is necessary, but you’re not sure what a comprehensive, high-quality service should include beyond a simple oil change.
Annual service, which must be performed by a qualified refrigeration and vacuum technician, involves changing all essential oils and filters, calibrating sensors, performing leak-checks, and running a full system diagnostic test to benchmark performance.
The Ultimate Health Check and Tune-Up
The annual service is the most in-depth and critical part of your long-term maintenance strategy. This is not a task for an in-house handyman; it requires specialized tools and a deep understanding of refrigeration and vacuum physics. This is when a professional restores the machine to its factory specifications, identifying subtle signs of wear and ensuring another year of reliable, efficient service. Think of it as a major tune-up for a high-performance car, setting the baseline for the entire next season.
The service begins with the replacement of all essential fluids and filters. This includes a full oil drain and replacement for both the vacuum pump and the refrigeration compressor, using the exact OEM-specified type of oil. Using the wrong oil can cause massive damage. The technician will also replace all refrigerant filters and driers, which are small components that trap moisture and contaminants that could otherwise clog the system or cause internal corrosion. Next comes the critical task of calibration and leak detection. The technician will use certified instruments to verify the accuracy of the temperature and pressure sensors. A temperature sensor that’s off by even 2 degrees can lead to improperly cooled produce, reducing shelf life and costing you money. They will use a highly sensitive electronic leak detector to scan the entire refrigeration circuit for tiny, invisible refrigerant leaks that reduce efficiency and are harmful to the environment. Following this, a complete system diagnostic is performed. This involves checking the amperage draw of all motors to ensure they are not under strain, testing the functionality of every solenoid valve, and analyzing the refrigeration cycle’s operating pressures (superheat and subcooling) to ensure it is running at peak efficiency. This comprehensive overhaul prepares your machine for the demands of the upcoming season and provides you with a detailed service report for your records, which is often crucial for food safety audits.
Conclusion
A simple, consistent maintenance routine—from daily checks and weekly cleaning to annual service and basic troubleshooting—is the best way to protect your investment, ensure reliability, and keep your vacuum cooler performing at its absolute best.
-
Explore how Siemens touch screens can streamline diagnostics and enhance operational efficiency. ↩
-
Learn how auditory cues can help detect issues early, saving time and money on repairs. ↩
-
Discover how visual leak checks can prevent major damage and ensure safety in your operations. ↩
-
Discover the role of vacuum chambers in food processing and their importance in maintaining product quality. ↩
-
Understanding HACCP standards is crucial for maintaining food safety and preventing contamination in food processing. ↩
-
Learn effective methods for cleaning condenser coils to ensure optimal performance and longevity of your refrigeration system. ↩
-
Explore strategies to enhance energy efficiency, which can lead to significant cost savings and environmental benefits. ↩
-
Understanding the function of an oil sight glass is crucial for maintaining machine health and ensuring proper lubrication. ↩
-
Learning about moisture contamination can help you identify issues early and maintain optimal machine performance. ↩
-
Exploring safety check protocols can help prevent accidents and ensure compliance with safety regulations. ↩
-
Understanding the operation of emergency stop buttons is vital for ensuring operator safety and machine reliability. ↩
Mila
You May Also Like

Buying a Vacuum Cooler for Fresh Produce Export? Avoid These Costly Procurement Mistakes
Buying a vacuum cooler for fresh produce export is not simply a machine purchase. It is a project decision that
How Much Produce Shrink Can Better Pre-Cooling Prevent in Export Projects?
Produce shrink in export projects is not simply a freshness problem. It is a commercial problem that compounds across every
Technical Specifications of Industrial Lettuce Vacuum Cooling Systems?
Buyers often look at a quote and only see the price. They ignore the technical specifications. This is a mistake.
Lettuce Vacuum Cooler Capacity Guide: Sizing for Your Operation?
Investing in a vacuum cooler is a significant decision, but choosing the wrong size can be an even more expensive

Field-to-Fork: Lettuce Vacuum Cooling in the Cold Chain Process?
We often talk about "freshness" as if it were magic, but in the lettuce business, freshness is purely a matter

Vacuum Cooling Organic Lettuce: Best Practices for Premium Quality?
Organic lettuce is a promise to the consumer: no chemicals, no shortcuts, just nature. But without the safety net of
Pre-Cooling Lettuce: Why Vacuum Cooling is the Industry Standard?
In the fresh produce industry, the clock starts ticking the moment a knife cuts a stem. For lettuce, heat is

Optimal Vacuum Cooling Parameters for Lettuce: Temperature and Timing?
In the world of post-harvest preservation, precision is the difference between a crisp, profitable shipment and a slimy, rejected claim.

Vacuum Cooling Different Lettuce Varieties: Is One Setting Enough for All?
Not all lettuce is created equal. A dense head of Iceberg is a fortress of water, while delicate Baby Spinach

Benefits of Vacuum Cooling for Lettuce Quality and Shelf Life?
Lettuce is 95% water, wrapped in cdsfvxgba fragile green skin. Once harvested, it is fighting a losing battle against heat