
How to Prevent a $10,000 Repair Bill with a $10 Checklist?
Your vacuum cooler is the heart of your post-harvest operation, a major investment in quality and efficiency. But like any high-performance engine, it can fail spectacularly if neglected, always at the worst possible time: the peak of harvest season.
An unexpected breakdown is a catastrophe. It’s not just the cost of emergency repairs; it’s lost product, missed shipping deadlines, and a damaged reputation with your buyers. A single failed component can cost you an entire container’s worth of profit.
Yes, you can prevent this with a disciplined preventive maintenance schedule. This is a simple series of recurring checks—daily, weekly, monthly, and annually—that spots small issues before they become catastrophic failures, guaranteeing uptime and protecting the long-term value of your investment.

Over my career, I’ve seen two types of machine owners: those who react to problems and those who prevent them. The preventers are always more profitable. They treat maintenance as a strategic advantage, not a chore. Let’s walk through the exact schedule that my most successful clients use.
What Daily Checks Can Prevent 90% of Common Problems?
In a busy packing house, it’s easy to overlook the small details. A little bit of dirt here, a strange new noise there. The temptation is to ignore it and keep production moving. But these are the early warning signs of bigger trouble ahead.
These "minor" issues are the root cause of most operational failures. A dirty door seal makes the vacuum pump work harder, consuming more energy and wearing out faster. A blocked drain can cause water to back up, creating a safety hazard. Ignoring the signs is like ignoring the check engine light on your car.
A 5-minute visual inspection at the start of every day is the single most effective thing you can do. This "walk-around" involves checking seals, fluid levels, and listening for anomalies. It empowers your operators to be the first line of defense for the machine’s health.
The Operator’s Daily Walk-Around Checklist
This routine is so simple it can, and should, become a habit for the first operator of the day. For an owner like Carlos, this checklist is his assurance that his primary asset is ready for a hard day’s work. For a manager like Sophia, this becomes a documented daily log for her HACCP and safety compliance records.
The "Look, Listen, and Feel" Approach
- Look at the Door Seal1: The main door’s rubber gasket is your primary seal. Any dirt, leaf debris, or grit on this seal will create a vacuum leak. This forces the pumps to run longer and harder, wasting electricity and causing premature wear. The operator should physically wipe it with a clean cloth. They should also look for any nicks or cuts in the rubber that need to be reported.
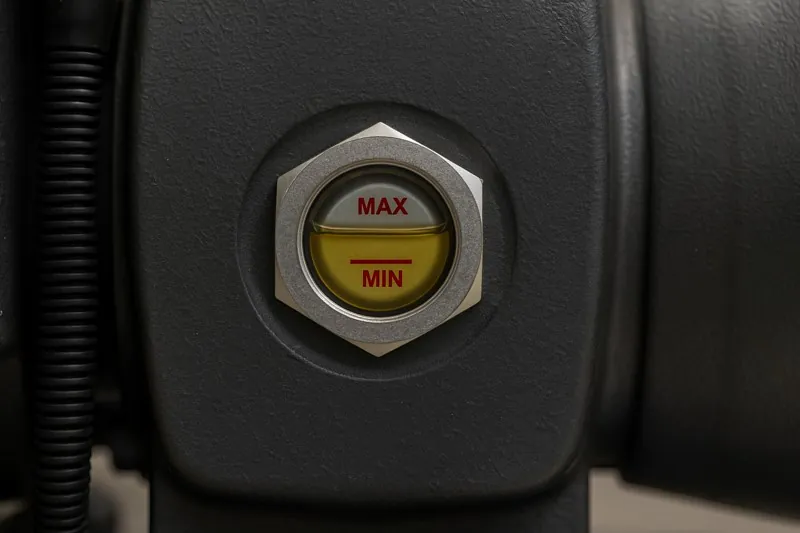
- Look at the Pump Oil: The vacuum pumps are the engine of your system. Just like a car engine, they need clean oil at the right level. There is a sight glass on the side of each pump. A quick glance is all it takes to confirm the oil level is correct. Low oil can cause a pump to seize, leading to a multi-thousand-dollar repair.
- Look at the Floor: Check for any new oil or water puddles under the machine. A small drip is an early warning of a failing seal or loose fitting that can be fixed easily now, but could become a major leak later.
- Listen to the Machine: The operator who runs the machine every day knows its normal sounds. When starting the first cycle, they should listen for any new or unusual noises—a squeal, a rattle, a knock. These are often the first signs of a bearing or belt that is about to fail. Reporting it early allows for a scheduled repair.
| Daily Check | Action | Why It’s Critical (The Risk of Skipping) |
|---|---|---|
| Door Seal | Wipe with a clean cloth | Prevents vacuum leaks, reduces energy costs, prevents pump burnout |
| Pump Oil Level2 | Visually check sight glass | Prevents catastrophic pump failure from oil starvation |
| Condensate Drain3 | Ensure it is clear and flowing | Prevents water backup, hygiene issues, and slip hazards (HACCP) |
| General Area | Look for leaks | Catches small problems before they become big, messy ones |
| Machine Sounds4 | Listen for unusual noises | Provides the earliest warning of mechanical component failure |
What Weekly Tasks Keep Your System Hygienic and Efficient?
After a week of operation, a fine layer of dust and organic residue can build up in places you don’t see every day. This buildup is not just a cosmetic issue; it’s a direct threat to your machine’s efficiency and your product’s safety.
A dirty condenser coil, for example, cannot release heat effectively. This forces your refrigeration system to work much harder, driving up your electricity bill and reducing its cooling capacity. Likewise, biofilm buildup inside the chamber is a food safety risk that cannot be ignored.
Your weekly maintenance should focus on two key areas: sanitation and heat exchange. This involves a more thorough cleaning of the chamber and a cleaning of the refrigeration system’s condenser coils to ensure optimal performance and hygiene.

The Sanitation and Efficiency Tune-Up
This is a scheduled task, perhaps for a Friday afternoon or a Monday morning. It’s a critical part of Sophia’s food safety plan, as it demonstrates a commitment to preventing microbial contamination. For Carlos, the energy savings from clean coils alone can pay for the labor involved.
1. Deep Cleaning the Chamber
This goes beyond the daily rinse.
- Use a Food-Grade Sanitizer5: Once a week, after sweeping out loose debris, the interior should be washed with a certified food-grade foaming cleaner or sanitizer. This should be applied according to the manufacturer’s directions, allowed to sit for the required contact time, and then thoroughly rinsed with low-pressure water. This step is crucial for eliminating any potential biofilm buildup6, which is a key control point in any HACCP plan7.
2. Cleaning the Condenser Coils
This is the machine’s radiator. It’s how the heat pulled from your vegetables is expelled into the atmosphere.
- Safety First: Before starting, ensure the machine is powered off at the main electrical disconnect. This is a non-negotiable safety step.
- The Cleaning Process: The condenser is a large unit with many fine metal fins. Over time, these fins get clogged with dust, pollen, and dirt. Using a soft-bristled brush, gently brush the fins in the same direction to loosen the debris. Then, use a compressed air blower or a shop vacuum in reverse to blow the dust out from the inside. Be careful not to use high-pressure water, as it can bend the delicate fins. A clean condenser can improve a machine’s energy efficiency8 by 10-15%.
| Weekly Task | Tools Required | Benefit for Carlos (Owner) | Benefit for Sophia (Compliance) |
|---|---|---|---|
| Chamber Sanitation | Food-grade sanitizer, hose, brush | Protects the stainless steel investment | Critical for HACCP and food safety |
| Condenser Cleaning | Soft brush, compressed air/vacuum | Lowers electricity bill, improves cooling | Ensures consistent machine performance |
| Check Door Hinges | Wrench set | Prevents door misalignment and seal wear | Ensures safe and proper door operation |
What Monthly Procedures Protect Your Core Components?
Some of the most important components of your vacuum cooler are the ones that work silently in the background. Belts stretch, sensors drift out of calibration, and safety systems sit untested. These issues won’t stop a cycle today, but they are setting the stage for a future failure.
A miscalibrated temperature sensor could mean you’re only cooling produce to 4°C when you think you’re hitting 2°C, shortening its shelf life. A loose pump belt could snap during the first cycle of the day, bringing your entire operation to a halt. These are preventable risks.
Monthly checks are a more technical inspection of the mechanical and electrical systems. This includes checking belt tension, verifying sensor accuracy, and testing safety mechanisms to ensure the heart of your machine is reliable and your data is accurate.
The Health Check for Your Machine’s Heart
This might be a task for a lead mechanic or a more technically inclined supervisor. The documented results of these checks are invaluable for a buyer like Norman, who relies on the accuracy of Carlos’s cooling data.
1. Inspecting Belts and Pulleys
The motor that drives your vacuum pump is connected by a set of heavy-duty belts.
- Tension and Wear: With the power locked out, remove the safety guard. The belts should be tight, with only a small amount of deflection when pushed. Inspect the belts for any signs of cracking, fraying, or glazing. A worn belt is cheap to replace; a snapped belt that takes out other components is not.
2. Calibrating Temperature and Pressure Sensors
Your entire process relies on accurate data.
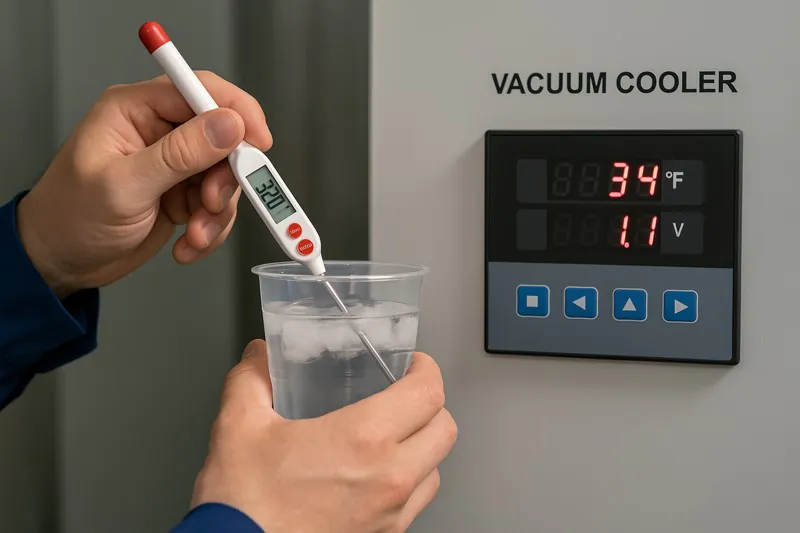
- Temperature Probe Check: The probe that measures the final temperature is critical. A simple way to check its accuracy is with a cup of ice water. A properly calibrated probe should read 0°C (32°F) when submerged. If the control panel shows a different reading, it may need to be professionally recalibrated. This ensures your cooling "recipe" is accurate.
- Pressure Sensor: The system cools until it reaches a specific vacuum pressure. While this requires specialized tools to fully calibrate, you can check for consistency. Make a note of the final pressure reading for a pallet of lettuce today. Next month, it should be nearly identical. A significant change could indicate a sensor issue.
3. Testing Safety Systems
Safety systems must be trusted to work when needed.
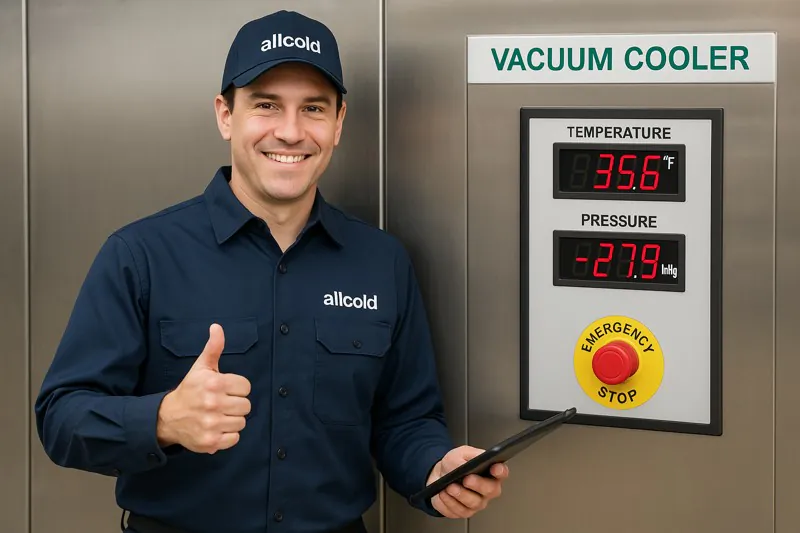
- Emergency Stop: Purposefully press one of the red E-stop buttons during a cycle. The entire machine should shut down instantly.
- Door Interlock: Ensure the main door cannot be opened while the machine is under vacuum. This is a critical safety feature that protects personnel.
| Monthly Check | Component | Action | Sign of Trouble Requiring Attention |
|---|---|---|---|
| Mechanical | Vacuum Pump Belts | Check tension and look for cracks | Fraying, glazing, or excessive slack |
| Data Accuracy | Temperature Probe | Verify against ice water (0°C / 32°F) | Reading is off by more than 1 degree |
| Safety Systems | E-Stop Buttons | Press to test shutdown function | System does not immediately stop |
Why Is an Annual Professional Service Non-Negotiable?
After a year of hard work, your machine will have internal wear that is invisible to the naked eye. The oil in the vacuum pump has lost viscosity, microscopic particles are starting to clog internal filters, and electrical contacts have endured thousands of cycles. You cannot see these problems brewing.
Skipping a professional annual service is the ultimate gamble. It’s like never taking your car for a major service and just hoping the engine doesn’t seize on the highway. A catastrophic failure of a main compressor or vacuum pump can cost tens of thousands of dollars and lead to weeks of downtime waiting for parts.
The annual service by a factory-certified technician is your machine’s comprehensive health check and performance guarantee. They use specialized tools and procedures to replace key wear items, test the entire system under load, and preemptively fix problems that would cause a failure in the coming season.
Your Annual Performance and Safety Guarantee
When our technician visits Carlos’s farm for the annual service, the goal is simple: ensure that the machine is as reliable on its 1000th day of operation as it was on its first. The service report we provide is a key document for Sophia’s compliance records, proving due diligence in equipment maintenance.
What a Technician Actually Does
- Complete Vacuum Pump Overhaul: This is the most critical part. We don’t just check the oil; we drain the old oil completely. We replace all internal oil-mist and exhaust filters. On older pumps, we may replace the internal vanes and seals. This restores the pump to factory-new performance.
- Refrigeration System Inspection: Our technicians connect gauges to the refrigeration circuit to check the refrigerant charge (the "Freon"). A low charge indicates a leak, which severely impacts cooling and can damage the compressor. We clean the evaporator coils inside the chamber and test all the compressor safety controls.
- Electrical System Audit: We go through the main electrical cabinet and check the torque on all high-voltage connections. Loose connections can overheat and cause fires. We test the function of every motor, contactor, and relay.
- Software and Calibration: We check if your machine’s control software has any available updates. We then use professional, calibrated instruments to verify and adjust the temperature and pressure sensors to ensure they are perfectly accurate.
The service concludes with a detailed report, outlining everything that was checked, replaced, and adjusted. This document is your proof of maintenance and your peace of mind for the next harvest season.
| Annual Service Area | Technician’s Key Actions | Long-Term Benefit |
|---|---|---|
| Vacuum System | Change oil and all filters, replace internal vanes | Guarantees fast vacuum, extends pump life by years |
| Refrigeration System | Check refrigerant charge, test compressor, clean evaporator | Prevents cooling loss and catastrophic compressor failure |
| Electrical System | Check torque on all terminals, test contactors | Prevents electrical faults and fire hazards |
| Control System | Calibrate all sensors with certified tools, update software | Ensures data accuracy, efficiency, and reliable automated cycles |
Conclusion
A preventive maintenance schedule is not an expense on a spreadsheet; it’s the operational backbone of your business. It is the proactive strategy that ensures your investment continues to pay dividends through maximum uptime, peak efficiency, and the guaranteed quality that your customers demand.
Understanding the role of the door seal can help prevent costly repairs and energy waste. ↩
Learn the best practices for pump oil maintenance to avoid catastrophic failures. ↩
Discover how a clear condensate drain ensures hygiene and prevents slip hazards. ↩
Identifying warning sounds can save you from expensive repairs and downtime. ↩
Understanding food-grade sanitizers is essential for maintaining food safety and preventing contamination. ↩
Discover the dangers of biofilm in food environments and how to effectively manage it. ↩
Exploring HACCP plans can enhance your knowledge of food safety protocols and compliance. ↩
Learn how maintaining equipment can lead to significant energy savings and lower operational costs. ↩
Interested in vacuum cooling for your operation?
Allcold has delivered systems to 30+ countries for fresh produce, bakery, and cooked food applications. Share your requirements with our engineering team.