
Is Operating a Bakery Vacuum Cooler Complicated or Can Anyone Do It?
You worry that introducing high-tech vacuum equipment will overwhelm your staff. You imagine a complex cockpit of buttons and levers that requires an engineering degree to operate, leading to production errors and wasted bread.
Operating a vacuum cooler is designed to be intuitive and mistake-proof. It follows a simple four-step logic: Load the trolley, insert the temperature probe, select the pre-set recipe on the touchscreen, and press start. The machine handles the physics automatically.
At Allcold, I believe that technology should serve the baker, not the other way around. When I train teams for clients like Carlos in Mexico, I see the relief on their faces when they realize they don’t need to do any math. The "Operating Manual" is not a textbook; it is a simple routine. However, doing it correctly makes the difference between a good loaf and a perfect loaf. This guide covers the standard operating procedures (SOP) that we implement in factories worldwide to ensure safety, efficiency, and consistency.
How Do You Prepare and Load the Chamber for Maximum Efficiency?
You might think you can just push the racks in randomly and close the door. But incorrect loading leads to uneven cooling, damaged sensors, and wasted energy, frustrating your team and slowing down the line.
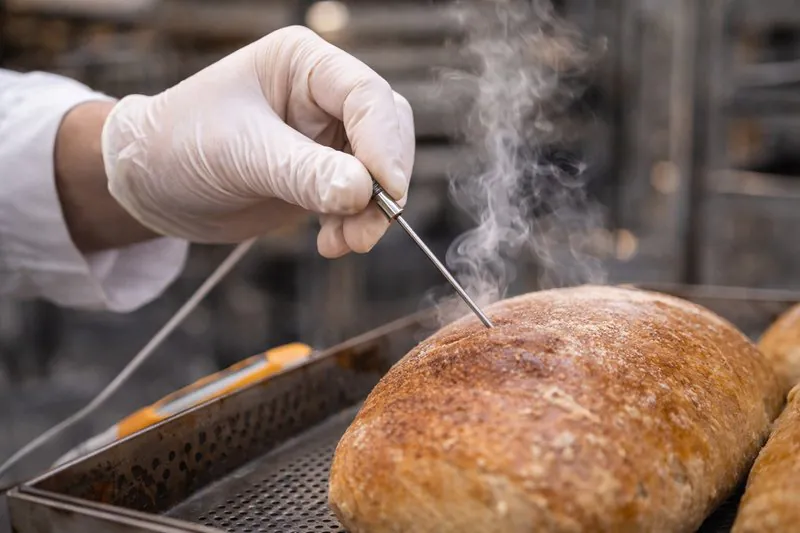
Proper loading involves centering the trolley to ensure even airflow and, most critically, correctly inserting the core temperature probe into the center of the largest loaf. This probe acts as the machine’s brain, telling it exactly when to stop.
The Art of Loading and Probing
The cooling cycle actually begins before you press the button. It begins with how you handle the hot product.
When the bread comes out of the oven, it is fragile. It is releasing steam.
I always teach my clients’ staff, specifically the "oven-men," that they are the pilots of this process. It is vital to understand that the machine relies on the data you give it. If you feed it bad data (by placing the probe incorrectly), you will get bad results.
1. Trolley Positioning1:
The vacuum chamber is designed for specific airflow patterns. If you jam the trolley against the side wall, you block the suction channels. This can cause the bread on one side to cool faster than the other.
- The Rule: Always push the trolley to the center or the designated guide rails on the floor.
- The Lock: Ensure the trolley wheels are locked or the trolley is secured in the floor guides. If the trolley moves during the rapid pressure change, it can hit the door sensor. This causes an emergency stop, and you lose time resetting the system.
2. The Critical Core Probe2:
This is the most important step in the entire manual.
Our machines run on "Temperature Logic3," not just "Time Logic."
If you set the target to 30°C, the machine needs to know the internal temperature of the bread to decide when to stop the vacuum pump.
- Placement: You must insert the stainless steel needle probe into the geometrical center of the thickest loaf on the rack.
- Why? If you put the probe in a small roll, that roll cools fast. The machine thinks the whole batch is done and stops. But the big loaves are still hot inside.
- The "Carlos Mistake": I remember Carlos’s team once left the probe hanging in the air. The probe read the air temperature (which drops instantly). The machine turned off in 30 seconds. The bread was still 95°C. They thought the machine was broken. It was just a placement error.
3. Door Safety4:
Modern vacuum coolers have heavy doors with inflatable seals or silicone gaskets.
- Check the Threshold: Before closing, look at the floor. Are there any fallen seeds, crumbs, or flour on the door track?
- The Seal: Even a small crust of bread can break the vacuum seal. If the chamber cannot build pressure, the pump works overtime and eventually alarms out. A quick wipe of the door seal with a cloth is a mandatory step before every cycle.
| Step | Action | Why it is Critical |
|---|---|---|
| 1. Inspect | Check chamber floor for debris. | Prevents vacuum leaks. |
| 2. Load | Push rack to guide rails. | Ensures even airflow. |
| 3. Probe | Insert needle into thickest loaf. | Accurate process control. |
| 4. Close | Secure door and check lock. | Safety interlock engagement. |
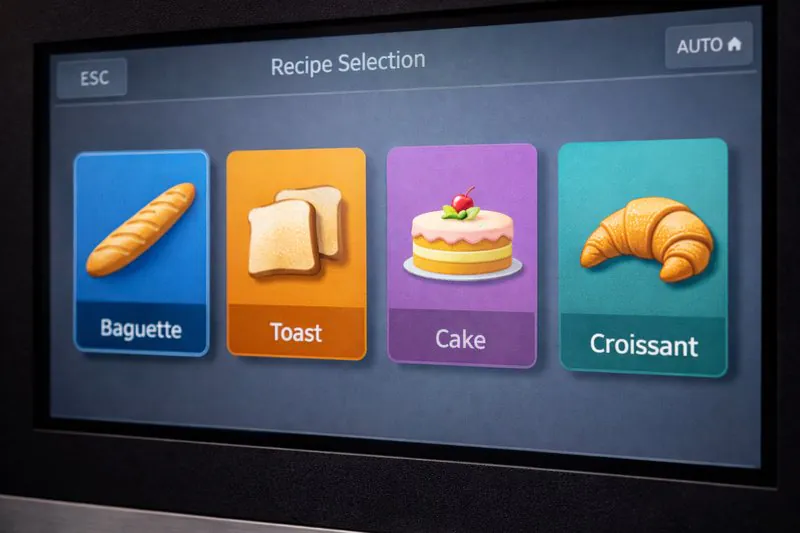
Which Cooling Recipe Should You Choose for Different Products?
You fear that one setting fits all, leading to exploded muffins or soggy baguettes. You worry that your operators won’t know which button to press, ruining a sensitive batch of artisan pastries.
We pre-program specific "Recipes" into the PLC that adjust the vacuum speed and target temperature for each product type. The operator simply selects the image of the product—like "Croissant" or "Rye Bread"—ensuring the machine treats delicate structures gently and dense loaves aggressively.
Understanding the Parameters
This section is for the Production Manager (like Sophia) to understand, so she can set the rules for the operators.
The vacuum cooler is a tool of physics. It lowers the boiling point of water.
However, if you boil the water inside a cake too fast, the cake explodes. If you cool a baguette too slowly, the crust gets soft.
We control this using three main variables in the Recipe settings on the Human Machine Interface (HMI).
- Slicing Bread: Usually set to 30°C. This is the perfect temperature for slicing blades. If it is warmer, the bread gums up the blades.
- Cream Filling: If you are cooling buns to be filled with cream, you might go lower, to 10°C or 15°C, to prevent the cream from melting.
- Storage: If the bread goes to a freezer, we cool it to 25°C. It is much cheaper to cool bread in a vacuum than in a spiral freezer.
2. Evacuation Speed6 (The "Ramp"):
This is how fast the pump pulls the air out. This is the secret to quality control.
- Fast Mode (Crusty Products): For Baguettes or Sourdough. We want a rapid drop in pressure. This "shocks" the crust, making it crispy and shattering. It creates that beautiful crackled surface that customers love.
- Slow/Step Mode (Soft Products): For Sponge Cake, Muffins, or Brioche. These products have a weak structure. If we pull the vacuum too fast, the internal steam expands violently and rips the cake apart. We use a "Step-Down" curve. We pull to 500mbar, wait, pull to 300mbar, wait. This allows the structure to stabilize as it cools.
3. Hold Time7:
Sometimes, we reach the target temperature, but we want to "dry" the bread a bit more.
We can add a "Hold Time" of 1 or 2 minutes at the end of the cycle. The vacuum stays on, but the pressure stabilizes. This pulls more moisture out of the crust, extending shelf life.
The Operator’s Job8:
The operator does not need to know these numbers.
They just see a picture on the screen.
- Icon: Baguette -> They press it.
- Icon: Muffin -> They press it.
The PLC (computer) handles the valves and motor speeds automatically. This prevents human error and ensures that the night shift produces the same quality as the day shift.
| Product Type | Vacuum Speed | Target Temp | Goal |
|---|---|---|---|
| Sourdough / Crusty | Fast / Aggressive | 30°C – 35°C | Maximum crust crispiness. |
| Toast / Sandwich | Medium | 28°C – 30°C | Clean slicing, no gumminess. |
| Sponge Cake | Slow / Stepped | 25°C | Prevent collapsing/explosion. |
| Filled Pastry | Medium | 15°C | Ready for cream injection. |
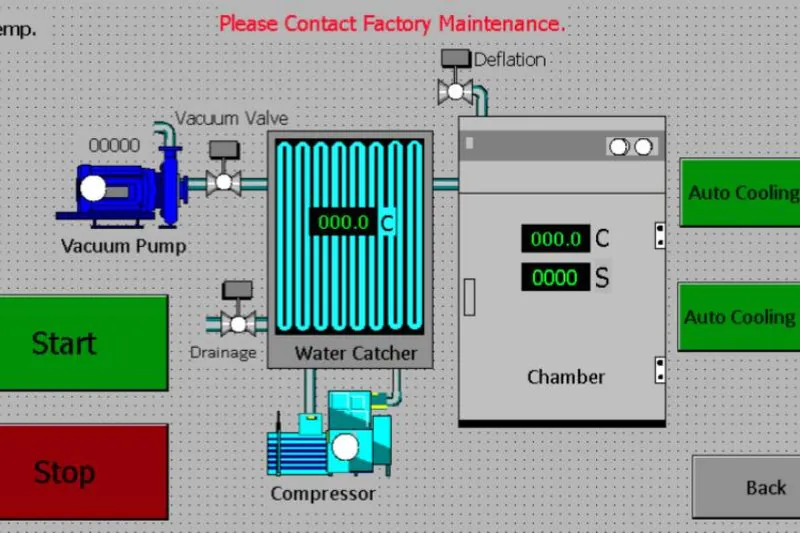
What Should You Monitor While the Machine Is Running?
You might think you need to stare at the pressure gauges constantly. You worry that if you walk away, the machine will malfunction or the pressure will get too low, crushing the bread.
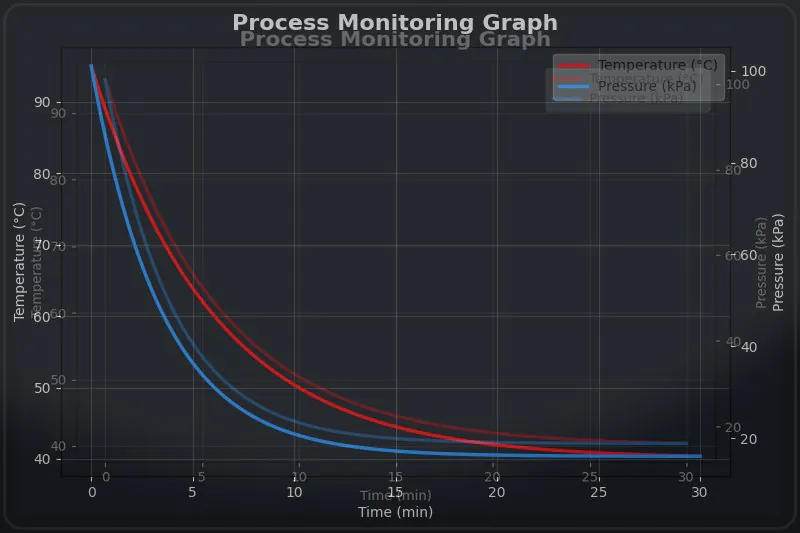
Once the cycle starts, the process is fully automated and self-monitoring. The screen displays a real-time graph of the temperature and pressure, and the machine will automatically alert you with a light or buzzer if any parameter drifts outside the safety zone.
The Phases of the Cycle
While the operator can walk away to prepare the next trolley, it is good to understand what the machine is actually doing.
When I give a tour of the Allcold factory, I explain the "Swoosh" sound.
The cycle has four distinct phases that you can see visually on the control screen.
Phase 1: Evacuation (The Pump Down)9
- Action: The large vacuum pumps turn on. The main valves open.
- What you see: The pressure number drops from 1013 mbar (atmospheric pressure) down to roughly 500 mbar.
- Product Status: Nothing happens to the temperature yet. We are just removing the air from the room to create the environment for cooling.
Phase 2: The Flash Point[10]
- Action: The pressure hits roughly 300 mbar to 200 mbar.
- The Physics: At this pressure, the boiling point of water drops to 60°C or 70°C. Since the bread is 95°C, the water inside the bread "flashes" into steam instantly.
- What you see: The Temperature line on the graph suddenly falls off a cliff. It drops rapidly. This is where the cooling actually happens. It is fast and efficient.
Phase 3: The Cooling Zone10
- Action: The machine modulates the valve to control the boil. It doesn’t just suck everything out; it manages the pressure to keep the boiling gentle.
- What you see: The temperature goes from 60°C -> 50°C -> 40°C -> 30°C. The bread is stabilizing.
Phase 4: Aeration (The Refill)11
- Action: The probe hits the target (e.g., 30°C). The pumps turn off. The "Vacuum Breaker" valve opens to let air in.
- The Sound: You hear a loud "Whoosh" as clean, filtered air rushes back into the chamber.
- Pressure: The pressure goes back up to 1013 mbar.
- Signal: The Green Light turns on. The buzzer sounds. The door unlocks automatically.
Troubleshooting during the run:
If the machine stops and shows an alarm, it is usually one of two things:
- Overload: The water flow to the pump is too low, and the pump got hot.
- Time-Out: The machine tried to cool the bread for 20 minutes but the temperature didn’t drop. This usually means the probe fell out of the bread.
| Cycle Phase | Duration (Approx) | What is Happening? | Operator Action |
|---|---|---|---|
| Evacuation | 1 – 2 mins | Removing air from chamber. | Wait / Prepare next rack. |
| Flash Point | Instant | Boiling begins. | Monitor graph. |
| Cooling | 3 – 5 mins | Heat energy converts to steam. | None. |
| Aeration | 30 seconds | Air returns to chamber. | Prepare to unload. |
What Maintenance Steps Must You Follow at the End of Every Shift?
You assume that maintenance is a monthly task for a specialized technician. You neglect daily cleaning, which leads to mold growth in the pipes and reduced efficiency of the vacuum pumps over time.
Daily maintenance is a simple 10-minute hygiene routine: wiping down the chamber to remove crumbs, sanitizing the core probe, and running the automated "Self-Cleaning" cycle to flush the internal pipes with disinfectant vapor.
Hygiene and Pump Health
Vacuum cooling is a very clean process, but it involves moisture.
We are pulling liters of water vapor out of the bread. This vapor condenses in the pipes, the heat exchanger, and the water tank.
If you leave warm, moist flour particles in a dark pipe, you create a perfect home for mold.
For my client Norman, who is obsessed with food safety audits, this is the most critical part of the manual. A clean machine is a safe machine.
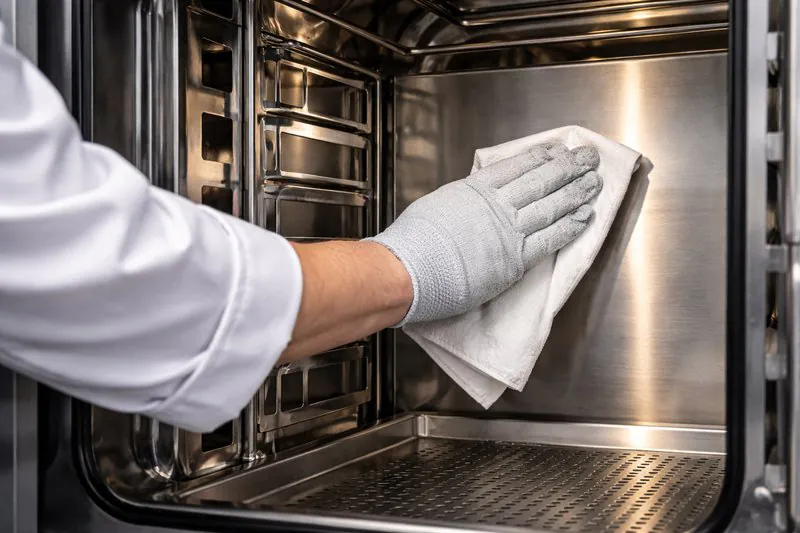
1. The Chamber Wipe-Down:
- The Hazard: Flour, sesame seeds, and poppy seeds fly off the bread during the "Flash" phase. They land on the floor and the walls.
- The Task: Use a food-safe sanitizer and a cloth. Wipe the stainless steel walls. Sweep the floor.
- The Probe: The probe goes into the bread every time. It must be sterilized. Use an alcohol wipe or dip it in sanitizing solution between batches (or at least at the end of the shift).
2. The "Wash Cycle" (CIP – Clean In Place):
Most Allcold machines have a "Wash" button on the screen.
- How it works: You place a bucket of sanitizing solution (like a mild chlorine mix or specialized food-safe cleaner) near the intake valve inside the chamber. The machine sucks this mist through the vacuum pipes, through the heat exchanger, and into the water tank.
- Benefit: This kills any bacteria hiding in the piping system where you cannot reach with a cloth. It ensures your next batch of bread is not contaminated by the previous day’s residue.
3. The Pump Oil Check:
The vacuum pump is the engine. It uses oil to seal the vanes and lubricate the system.
- The Sight Glass: Look at the little window on the pump.
- Level: Is the oil level in the middle?
- Color: Is the oil clear like honey, or dark like cola?
- Milky Oil: This means water has mixed with the oil (emulsification). You need to run the "Pump Warm-Up" cycle to evaporate the water.
- Dark Oil: It is dirty. You need to call maintenance to change it.
- Clear Oil: You are good to go.
4. The UV Lamp:
If your machine has a UV-C lamp installed in the ceiling (an option we often add for high-hygiene clients), check that it lights up blue. This lamp sterilizes the air before it hits the bread during the aeration phase. If the bulb is dead, replace it immediately to maintain your HACCP standards.
| Component | Frequency | Action | Goal |
|---|---|---|---|
| Chamber Walls | Daily | Wipe with sanitizer | Remove organic debris. |
| Core Probe | Every Batch | Alcohol wipe | Prevent cross-contamination. |
| Vacuum Pipes | Daily | Run "Wash Cycle" | Sterilize internal airways. |
| Pump Oil | Daily | Visual check (color/level) | Ensure mechanical health. |
| Door Gasket | Weekly | Inspect for cracks | Ensure vacuum integrity. |
Conclusion
Operating a bakery vacuum cooler is a structured, repeatable process. By mastering the four steps—Loading, Recipe Selection, Monitoring, and Cleaning—you ensure that your machine runs efficiently for years. It is not about being an engineer; it is about being a disciplined baker who respects the workflow.
-
Understanding trolley positioning is crucial for optimal airflow and cooling efficiency in vacuum systems. ↩
-
Learn the importance of probe placement to ensure accurate temperature readings and prevent baking errors. ↩
-
Discover how Temperature Logic enhances cooling efficiency and product quality in baking processes. ↩
-
Explore essential safety checks to maintain vacuum integrity and prevent system failures. ↩
-
Understanding target temperature is crucial for achieving optimal cooling results in baking. ↩
-
Explore how evacuation speed can enhance the texture and quality of various baked products. ↩
-
Learn about hold time and its impact on moisture removal and shelf life of baked goods. ↩
-
Discover the operator’s role in ensuring consistent quality in vacuum cooling operations. ↩
-
Understanding the evacuation phase is crucial for optimizing vacuum cooling processes and ensuring product quality. ↩
-
Learning about the cooling zone helps in mastering temperature control, vital for effective cooling operations. ↩
-
Discovering the aeration phase is key to understanding how to safely return products to normal pressure after cooling. ↩
Need vacuum cooling for your production line?
Allcold engineers work with central kitchens and bakeries to spec the right cooling system for your production volume and food type.
Mila
You May Also Like

When Should You NOT Use Vacuum Cooling for Your Bakery?
Are you tired of waiting hours for your bread to cool down while your profits evaporate? You might think vacuum

Is Your Cooling Strategy Burning Your Profits? A Cost-Benefit Analysis of Vacuum vs. Conventional Cooling
As a bakery owner, you look at your balance sheet every month. You see the cost of ingredients, labor, and
Hybrid Cooling Solutions: Can Combining Vacuum and Traditional Methods Save Your Bakery?
Are you torn between the speed of new technology and the reliability of traditional freezing? Many bakery owners feel they
Blast Freezers vs Vacuum Coolers: Which Is the Right Choice for Your Bakery?
Are you tired of watching your freshly baked bread sit on racks for hours, taking up valuable space while you

Bakery Vacuum Cooling vs Spiral Cooling Systems: Which Is Better for Your Business?
Are you struggling with slow production lines because your bread takes forever to cool down? You are not alone. Cooling
Is a Vacuum Cooler the Missing Ingredient in Your Hotel or Restaurant Bakery?
Imagine your kitchen is in full swing, and the freshly baked bread is finally out of the oven, but it
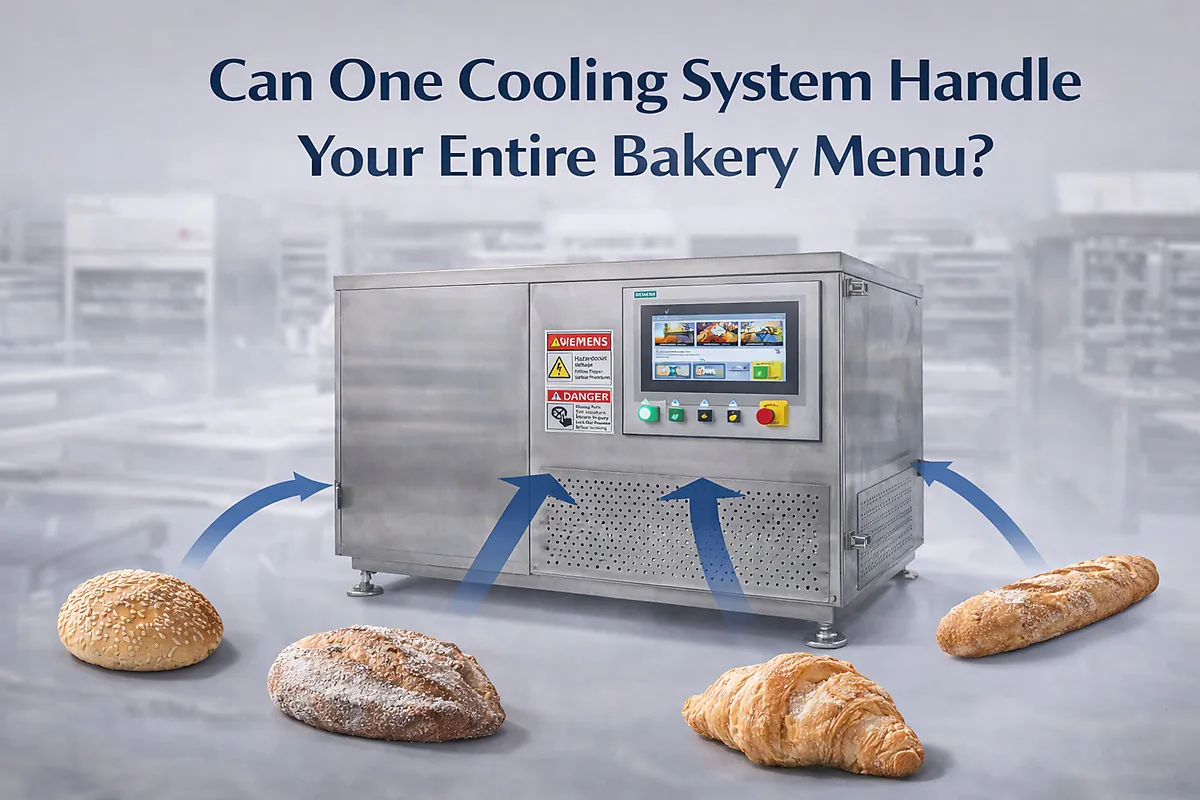
Can One Cooling System Handle Your Entire Bakery Menu?
You juggle sourdough, delicate pastries, and frozen dough lines daily. Yet, one cooling mistake ruins the texture of your artisan

Is Your Frozen Dough Production Losing Quality Before It Hits the Freezer?
You watch your energy bills climb month after month while your blast freezers work overtime. You see production bottlenecks form
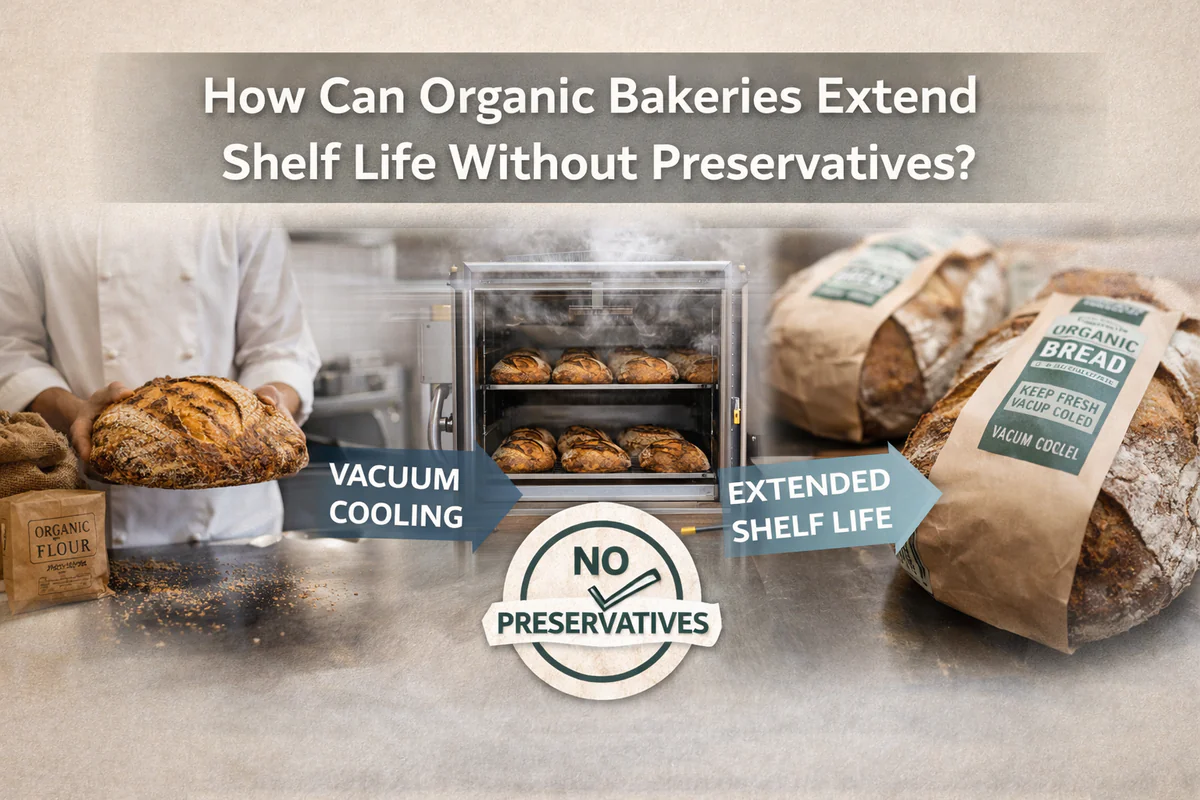
How Can Organic Bakeries Extend Shelf Life Without Preservatives?
You pour your heart into sourcing the finest organic flours and perfecting natural fermentation, only to watch your hard work

Can Vacuum Cooling Finally Fix the "Gummy" Texture in Gluten-Free Bread?
You watch your perfectly risen gluten-free loaves come out of the oven, only to see them sink or turn gummy