
Is Operating a Bakery Vacuum Cooler Complicated or Can Anyone Do It?
You worry that introducing high-tech vacuum equipment will overwhelm your staff. You imagine a complex cockpit of buttons and levers that requires an engineering degree to operate, leading to production errors and wasted bread.
Routine operation can be organized into loading, product measurement, approved cycle selection and monitored unloading. The machine’s interface supports that sequence, but correct operation still depends on training and the instructions supplied with the particular equipment.
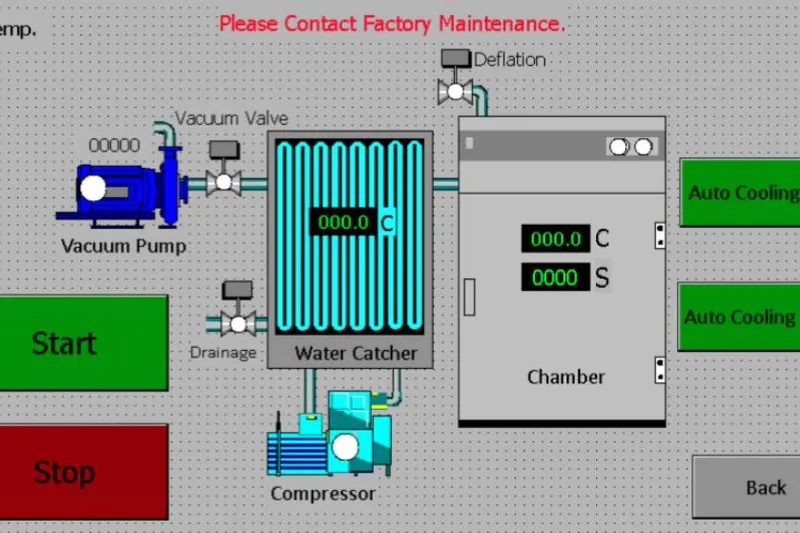
This article is an operating checklist for discussion, not a replacement for an Allcold machine manual or a validated site procedure. Use it to identify the loading, control and cleaning information your team needs before production begins.
How Do You Prepare and Load the Chamber for Maximum Efficiency?
You might think you can just push the racks in randomly and close the door. But incorrect loading leads to uneven cooling, damaged sensors, and wasted energy, frustrating your team and slowing down the line.
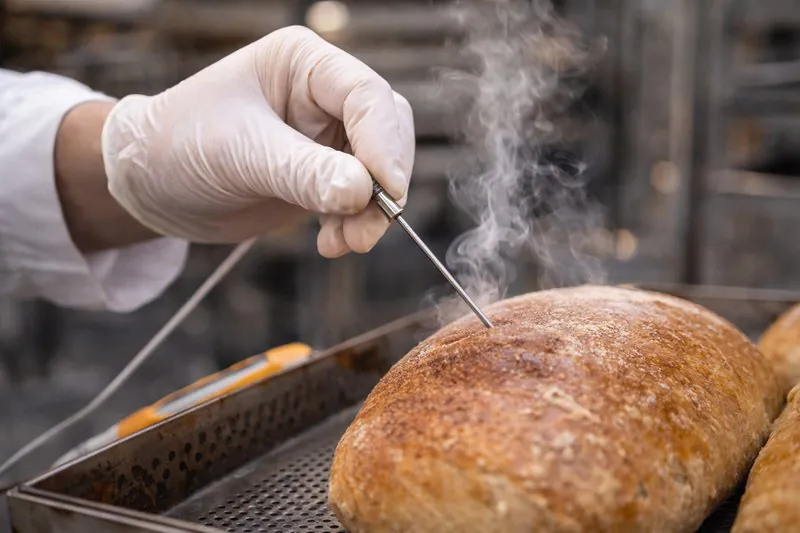
Position the trolley as specified for the chamber and place each product probe at the approved sampling point. Avoid contact with metal or packaging where it would distort the reading. The control role of each probe must be confirmed for the machine.
The Art of Loading and Probing
The cooling cycle actually begins before you press the button. It begins with how you handle the hot product.
When the bread comes out of the oven, it is fragile. It is releasing steam.
I always teach my clients’ staff, specifically the "oven-men," that they are the pilots of this process. It is vital to understand that the machine relies on the data you give it. If you feed it bad data (by placing the probe incorrectly), you will get bad results.
1. Trolley positioning: Follow the approved loading diagram and preserve door, sensor and service clearances. Confirm the rack fits at its full loaded height, including trays and any projections.
- Use the approved trolley position and secure the load as specified.
- Keep the door, sensors and loading clearances unobstructed.
2. Product probes: Use the placement method established for the actual product and load. Confirm whether and how each reading controls cycle completion; one local measurement does not establish the temperature of every item.
- Place product probes at the locations established for the actual load.
- Check sensing contact and avoid metal surfaces or free air when product temperature is required.
3. Door safety: Inspect and operate the door and sealing arrangement according to the machine manual. Never force a door open or bypass an interlock.
- Inspect the door area and sealing surfaces as instructed.
- Report damaged parts and never bypass an interlock or force the door.
| Step | Operator check | Basis |
|---|---|---|
| Inspect | Door, load path and visible condition | Machine manual |
| Load | Approved rack position and clearances | Loading diagram |
| Measure | Correct probe location and contact | Product procedure |
| Start | Approved settings and normal readiness | Supplied controls |
Which Cooling Recipe Should You Choose for Different Products?
You fear that one setting fits all, leading to exploded muffins or soggy baguettes. You worry that your operators won’t know which button to press, ruining a sensitive batch of artisan pastries.
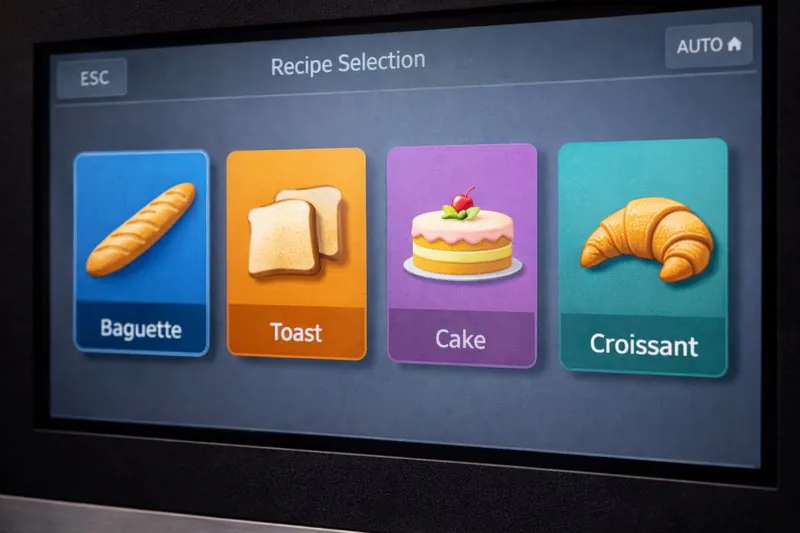
Confirm the available cycle settings and recipe functions on the supplied HMI. The approved procedure should identify the correct settings for each product; pictorial recipe selection and a library of prevalidated products are not universal standard features.
Understanding the Parameters
The production team should agree which settings operators may select and which require technical authorization. Product type, batch load, pressure sequence and cooling endpoint all belong in that discussion.
- Define the required condition for slicing, packing or the next process.
- Use the approved product endpoint rather than a universal temperature from an example.
2. Evacuation Speed6 (The "Ramp"):
This is how fast the pump pulls the air out. This is the secret to quality control.
- Confirm which pressure-control settings are supplied and who may change them.
- Use the sequence approved for the product; do not copy generic step pressures.
3. Hold time: If a hold stage is part of the supplied control and approved process, document its purpose and limits. Do not add extra vacuum time simply to dry the product without assessing the resulting quality and yield.
The operator’s job: Match the actual product and load to the approved instruction, check probe placement and report abnormal readings. Password protection can help control access to settings; it cannot prevent every loading or selection error.
- Select the approved instruction or recipe for the actual load.
- If the product or loading format changes, obtain the required review before using the previous settings.
| Product requirement | Information to establish | Approval basis |
|---|---|---|
| Slicing bread | Endpoint and crumb condition | Representative product trial |
| Delicate products | Allowed pressure sequence and shape retention | Product and machine assessment |
| Filled products | Suitability and subsequent handling | Product-specific procedure |
| Mixed menu | Separate loading and setting instructions | Approved product list |
What Should You Monitor While the Machine Is Running?
You might think you need to stare at the pressure gauges constantly. You worry that if you walk away, the machine will malfunction or the pressure will get too low, crushing the bread.
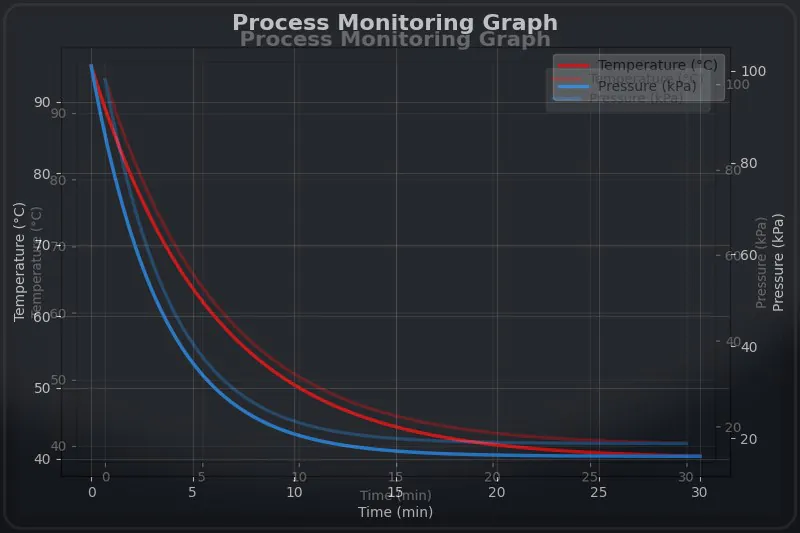
Allcold’s confirmed PLC/HMI functions include live operating values, automatic and manual control, alarms and password protection. These provide a clear operating interface for a bakery cooling system, while staff still need the machine-specific instructions and an approved loading method. Confirm recipe screens, recording functions and cleaning provisions in the actual supply; they should not be inferred from another machine’s display.
The HMI provides live operating information and alarms according to the supplied configuration. Follow the required monitoring and response procedure. Historical graphs, particular warning outputs and unattended operation should not be inferred from the presence of a touchscreen.
The Phases of the Cycle
Understand the operating stages described in the machine manual so that normal progression can be distinguished from an alarm or interruption. The following overview is qualitative; durations and pressure thresholds depend on the product and equipment.
Phase 1: Evacuation (The Pump Down)9
- The vacuum system reduces chamber pressure according to the supplied sequence.
- Observe the displayed state; evaporation may begin at different pressures depending on product temperature.
Phase 2: The Flash Point[10]
- As pressure falls, evaporation removes heat from the product.
- There is no single flash-pressure threshold for all initial temperatures and recipes.
Phase 3: The Cooling Zone10
- Follow the supplied control sequence while checking the relevant live values.
- Record deviations and use the alarm procedure rather than changing settings without approval.
Phase 4: Aeration (The Refill)11
- Wait for the approved cycle-complete state and pressure equalization.
- Open and unload only as allowed by the machine instructions and interlocks.
If an alarm occurs, record the displayed message, product condition and stage reached. Follow the manual and obtain qualified assistance when required rather than assuming a single cause or repeatedly resetting the machine.
- Overload: The water flow to the pump is too low, and the pump got hot.
- Time-Out: The machine tried to cool the bread for 20 minutes but the temperature didn’t drop. This usually means the probe fell out of the bread.
| Stage | What to observe | Operator responsibility |
|---|---|---|
| Pressure reduction | Machine state and relevant live values | Follow the approved monitoring procedure |
| Product cooling | Product readings and any alarms | Record and respond to deviations |
| Pressure equalization | Approved completion indication | Do not force or bypass the door |
| Unloading | Product and load condition | Follow the handling procedure |
What Maintenance Steps Must You Follow at the End of Every Shift?
You assume that maintenance is a monthly task for a specialized technician. You neglect daily cleaning, which leads to mold growth in the pipes and reduced efficiency of the vacuum pumps over time.
Cleaning and maintenance requirements depend on the installed equipment and the bakery’s hygiene procedure. Use the approved chemicals, methods and isolation steps. Automatic cleaning, chemical circulation and a fixed ten-minute cleaning routine are not confirmed universal Allcold features.
Hygiene and Pump Health
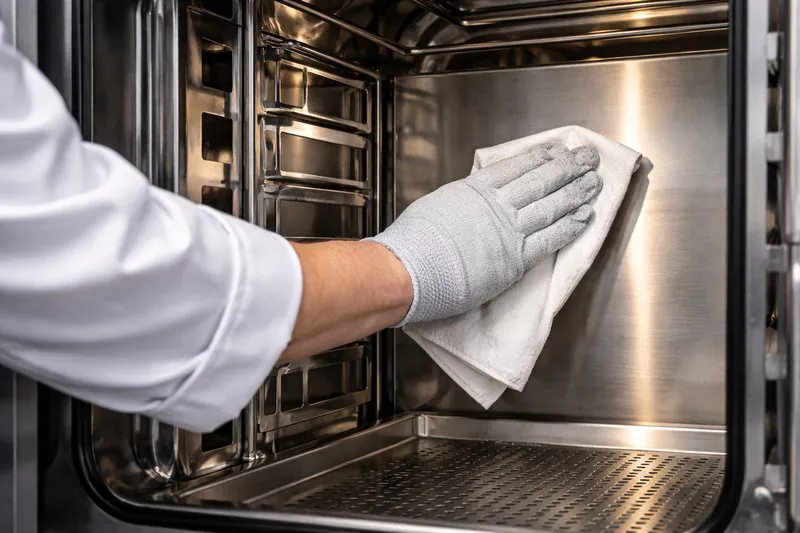
Food residue and moisture must be managed through the approved cleaning procedure. Confirm the accessible surfaces, drainage and any specialist cleaning tasks before production begins. A clean appearance alone does not validate sanitation.
1. The Chamber Wipe-Down:
- Clean accessible surfaces and probes using the approved method and compatible materials.
- Follow the site hygiene plan and equipment limits; surface wiping is not a universal sterilization procedure.
2. Internal circuits: Confirm how the installed pipework and heat-exchange components are to be cleaned. Do not introduce cleaning chemicals into a vacuum inlet unless the manufacturer has explicitly approved that procedure for the machine.
- Obtain manufacturer-approved instructions for internal circuits.
- Do not draw disinfectant mist or other chemicals into vacuum equipment using an improvised procedure.
3. Vacuum equipment: Identify the actual pump type and follow its maintenance manual. Oil-based maintenance instructions apply only where the installed pump uses the specified oil system.
- Identify the installed pump and its specified inspection method.
- Follow its manual for oil level, condition, servicing and shutdown where applicable; refer abnormal conditions to qualified maintenance.
4. Additional hygiene equipment: UV treatment and automatic cleaning are not confirmed standard Allcold provisions. If an accessory is specified, obtain its operating and maintenance instructions and validate its role in the site’s hygiene process.
| Area | Planning requirement | Source of instruction |
|---|---|---|
| Chamber and probes | Approved cleaning method and frequency | Site hygiene plan and equipment manual |
| Internal circuits | Specific cleaning method if required | Manufacturer-approved procedure |
| Vacuum equipment | Tasks for the actual pump type | Component manual |
| Door and seals | Inspection and service requirements | Machine manual |
Conclusion
A clear routine helps operators use the cooler consistently. Document loading, approved settings, monitoring, unloading and cleaning, and revise the procedure when the product or equipment changes.
Understanding trolley positioning is crucial for optimal airflow and cooling efficiency in vacuum systems. ↩
Learn the importance of probe placement to ensure accurate temperature readings and prevent baking errors. ↩
Discover how Temperature Logic enhances cooling efficiency and product quality in baking processes. ↩
Explore essential safety checks to maintain vacuum integrity and prevent system failures. ↩
Understanding target temperature is crucial for achieving optimal cooling results in baking. ↩
Explore how evacuation speed can enhance the texture and quality of various baked products. ↩
Learn about hold time and its impact on moisture removal and shelf life of baked goods. ↩
Discover the operator’s role in ensuring consistent quality in vacuum cooling operations. ↩
Understanding the evacuation phase is crucial for optimizing vacuum cooling processes and ensuring product quality. ↩
Learning about the cooling zone helps in mastering temperature control, vital for effective cooling operations. ↩
Discovering the aeration phase is key to understanding how to safely return products to normal pressure after cooling. ↩
Need vacuum cooling for your production line?

Mila
You May Also Like

When Should You NOT Use Vacuum Cooling for Your Bakery?
Are you tired of waiting hours for your bread to cool down while your profits evaporate? You might think vacuum

Is Your Cooling Strategy Burning Your Profits? A Cost-Benefit Analysis of Vacuum vs. Conventional Cooling
As a bakery owner, you look at your balance sheet every month. You see the cost of ingredients, labor, and
Hybrid Cooling Solutions: Can Combining Vacuum and Traditional Methods Save Your Bakery?
Are you torn between the speed of new technology and the reliability of traditional freezing? Many bakery owners feel they
Blast Freezers vs Vacuum Coolers: Which Is the Right Choice for Your Bakery?
Are you tired of watching your freshly baked bread sit on racks for hours, taking up valuable space while you

Bakery Vacuum Cooling vs Spiral Cooling Systems: Which Is Better for Your Business?
Are you struggling with slow production lines because your bread takes forever to cool down? You are not alone. Cooling
Is a Vacuum Cooler the Missing Ingredient in Your Hotel or Restaurant Bakery?
Imagine your kitchen is in full swing, and the freshly baked bread is finally out of the oven, but it
Can One Cooling System Handle Your Entire Bakery Menu?
You juggle sourdough, delicate pastries, and frozen dough lines daily. Yet, one cooling mistake ruins the texture of your artisan

Is Your Frozen Dough Production Losing Quality Before It Hits the Freezer?
You watch your energy bills climb month after month while your blast freezers work overtime. You see production bottlenecks form
How Can Organic Bakeries Extend Shelf Life Without Preservatives?
You pour your heart into sourcing the finest organic flours and perfecting natural fermentation, only to watch your hard work
Can Vacuum Cooling Finally Fix the "Gummy" Texture in Gluten-Free Bread?
You watch your perfectly risen gluten-free loaves come out of the oven, only to see them sink or turn gummy